BIVOUAC
LIGHT BACKPACK & COMFORT: THE RIGHT COMPROMISE!
light bivouac backpack
LIGHT BACKPACK & COMFORT: THE RIGHT COMPROMISE!
light bivouac backpack
light bivouac backpack
Travel house ; home everywhere !
And if you really want to feel at home,
you don’t have to turn yourself into a sherpa…
light bivouac backpack
Travel house ; home everywhere !
And if you really want to feel at home, you don’t have to turn yourself into a sherpa…
STEPS FOR MAKING A LIGHT BIVOUAC BACKPACK
From equipment list to packing:

Step 1 :
Equipment list
If you don’t know how to build your backpack, you can make an equipment list before you start: spontaneously write down everything you think important to take.
This list will be specific to you : it will be adapted to your needs and objectives. Ideally, you should draw your inspiration from exhaustive lists and develop yours as you go along. To help you, we’ve provided a detailed equipment list.
When you’ve finished your list, review each article. To do this, ask yourself the following questions:
- What are my objectives/expectations (comfort, speed, autonomy, adventure) ?
- What equipment on my list is superfluous? Focus on the essentials: “Have I ever used this item?” ; “Do I really need it?” ; “What happens if I don’t have it with me?” ; “How can I do without it? Think about the multiple uses of objects to avoid duplication.
- If you’re not yet equipped, ask yourself what kind of equipment you should buy, given your objectives and your practice.
Step 2 :
Filling the backpack
Once your list of essentials ready, you can pack your bag: light bivouac backpack
- To begin, your water bag will slip into the dedicated compartment, along your back.
- Then, at the bottom of the bag, put your sleeping bag and things you’ll need after your hike.
- Near the back, place heavy equipment (tent, stove, food). However, depending on the bag, it’s sometimes preferable to have no volume against the back (if the bag doesn’t have a reinforced back, for example).
- In the rest of the space, you can place your hiking clothes, which will prevent your gear from wandering around in your bag. They’ll also be easier to access when, if you need it.
- The bag’s flap, as well as the top and/or bottom straps, allow you to put your tent or mattress inside to save space.
- Keep your day’s gear close to you (sunglasses, cap, cereal bar, sunscreen, etc.)
Step 3 :
Backpack adjustment
And finally, the ultimate step: adjusting your backpack. For optimum weight distribution, you need to adjust your pack to your backback. For bivouac packs, you need to adjust the back height before putting it on. Then, once on your shoulders, the waistbelt is the first item to be adjusted, followed by the shoulder straps and finally the tightening of the load reminder. Remember, it’s the hips that carry the weight.
OUR EQUIPMENTLIST
Backpack inventory:

Whatever the brand or bag construction of the backpack, the most important thing is to know the strengths and weaknesses of each option to choose the one that works for you. for a light bivouac backpack
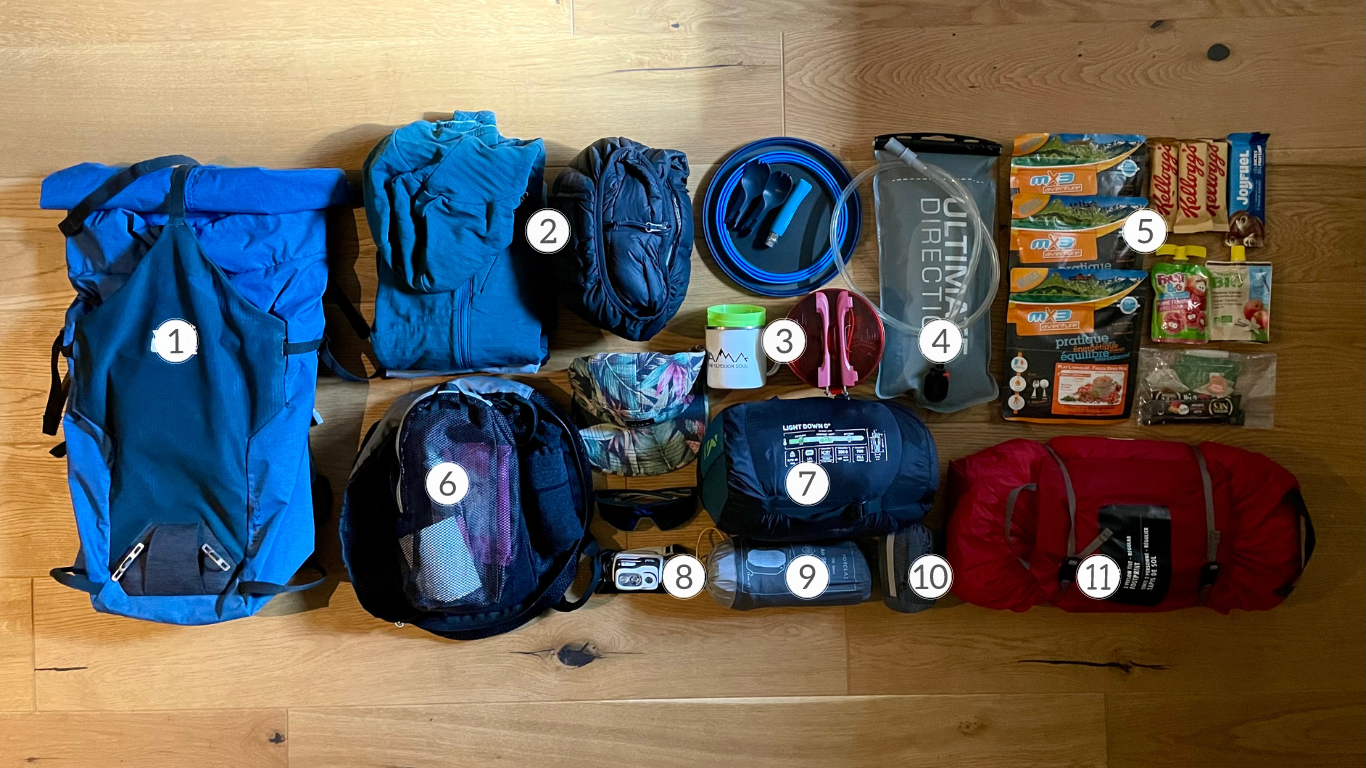
It’s possible to choose a polyvalent mountain bag (transformed into a light bivouac backpack) as shown here, or a bag designed for bivy.
The advantage of a polyvalent mountain backpack is: lightness. The disadvantage: the absence of a padded ventral strap and comfortable foam padding for carrying. It is therefore lighter but less comfortable to carry. Moreover, it sometimes lacks pockets and straps designed for external carrying of bivy gear (tent, mattress).
Whether you’re bivouacking or hiking, the 3-layer technique is preferable. Three layers of clothing are easier to modulate than one thick one. This means you can adjust the way you dress according to temperature and weather conditions.
In summer, for example, you can take a single T-shirt, a down jacket or a fleece and a rain jacket. (A down jacket is more compressible than a fleece, and has the best thermal/weight/size ratio. It also doubles up as a comfortable pillow!) You don’t have to take both, it’s up to you.
If you want to eat/drink hot, you’ll need to bring a stove with you. (Don’t forget to take a lighter or fire starter in case your gas lighter is capricious).
With lyophilized food, plates are not necessary because you can eat directly from them (here, we took large folding bowls to serve Simba’s meal 🐶).
Cutlery are useful if you don’t want to eat like Simba 😋. Glasses (and the Nuyama cup) for morning coffee are appreciated.
Water is essential… To minimize the load without running dry, literally, you can study potential refreshment points on your route before setting off. Filter bottles/flasks/water tablets can also be an alternative.
When bivouacking, it’s always best to opt for light, and easy-to-prepare dry foods. Pasta, rice, quinoa, couscous, lentils or red beans are good choices for their complex carbohydrate content and ease of preparation.
If you don’t want to carry a stove with you, many meals can be cooked in cold water (semolina, chinese noodles, powdered mashed potatoes, etc.). So all you need to do is wait a little longer. In around 15 to 30 minutes, the meal is ready!
Here, we took lyophilized ready meals (there are practical but more expensive). As well as instant coffee and bags of herbal tea; cereal bars and applesauce for a snack.
Don’t forget your garbage bag to carry your waste.
Toiletries can include a toothbrush, toothpaste, towelettes and a roll of biodegradable toilet paper.
It’s often a good idea to pack a first-aid kit as well, just in case.
Sleeping bags are chosen according to their thermal capacity, weight and compressibility: synthetic or feather, the choice is yours!
If your sleeping bag isn’t warm enough, you can also take a sleeping bag liner.
A headlamp is a small object with a big purpose. Indeed, even if the sun sets late in summer, having a source of light is essential when night falls.
Mattresses are chosen according to their insulating capacity, weight, comfort and compressibility.
In addition to your mattress, you can take a survival blanket to insulate yourself from the ground: lightweight and space-saving, it’s a good alternative to a mattress with low insulation capacity.
To save weight, you can use your down jacket rolled up in the hood or in a neck roll to make a comfortable pillow.
Here, we’ve chosen an inflatable bivouac pillow: light, compressible, pleasant (and superfluous, except when you’re cold and use your down jacket to sleep).
A tent is a bulky object… Once again, your choice of tent will depend on your needs and objectives.
Here, we’ve chosen a 2-person tent, lightweight and relatively compact.

BIVY IDEA
Le lac de Peyre :

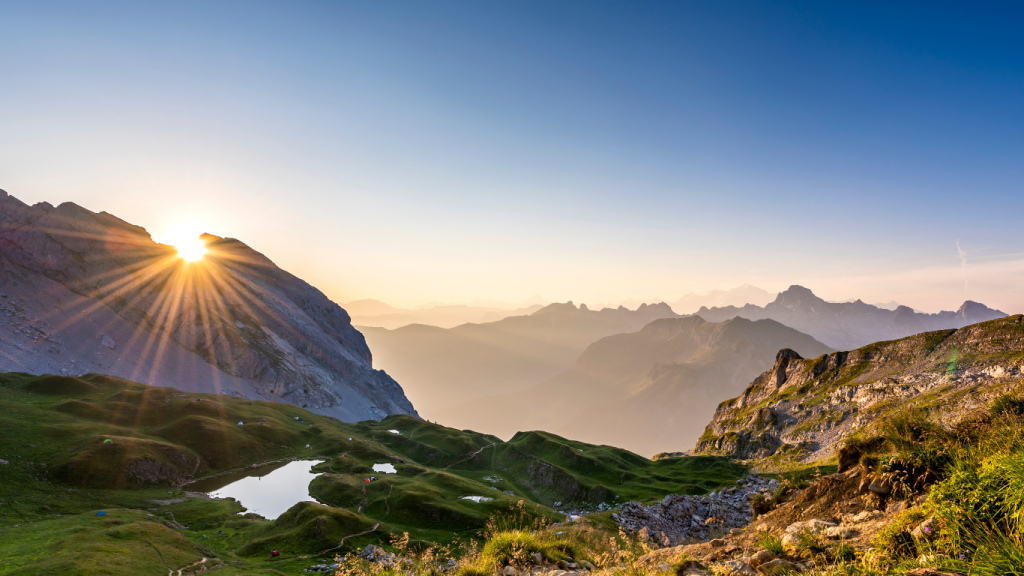
Le Lac de Peyre is a must-see hike in Haute-Savoie!
Situated at the foot of La Pointe Blanche and La Pointe du Midi, this pretty lake offers superb views of the Aravis Range and The Mont Blanc, making it an ideal place to bivouac.
Find the full description with our GPX FATMAP track 👇
As a bonus, you can push on to the heights of the Col of La Pointe de la Balafrasse, where the panorama takes on even more magnitude.
On the way back, don’t hesitate to stop at the restaurant du Col de la Colombière for a good refuel!

It’s the outdoor spaces and especially the desire to share them that led us to create the agency in 2019.
Our primary goal is to help you make the most of the extraordinary experience the mountains have to offer. Whether you’re looking to recharge your batteries or challenge yourself physically, we’ve got an activity just for you!
With passion, sharing and confidence 🏔️
